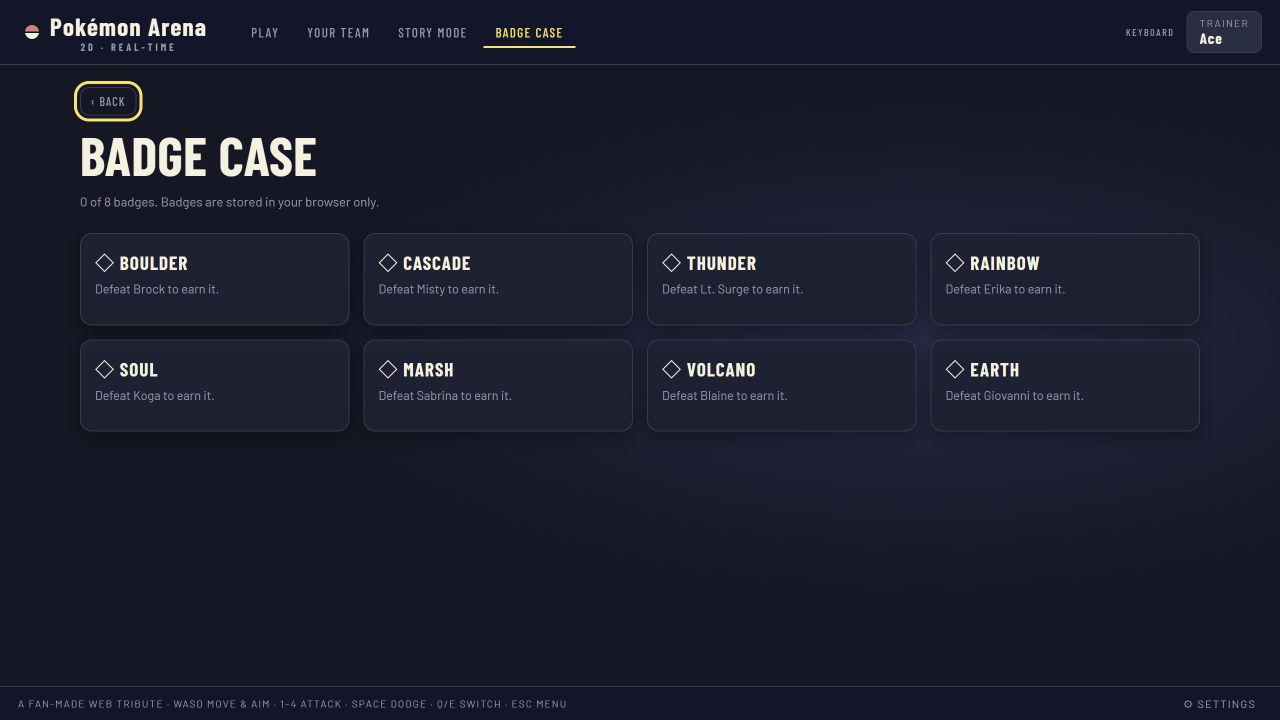
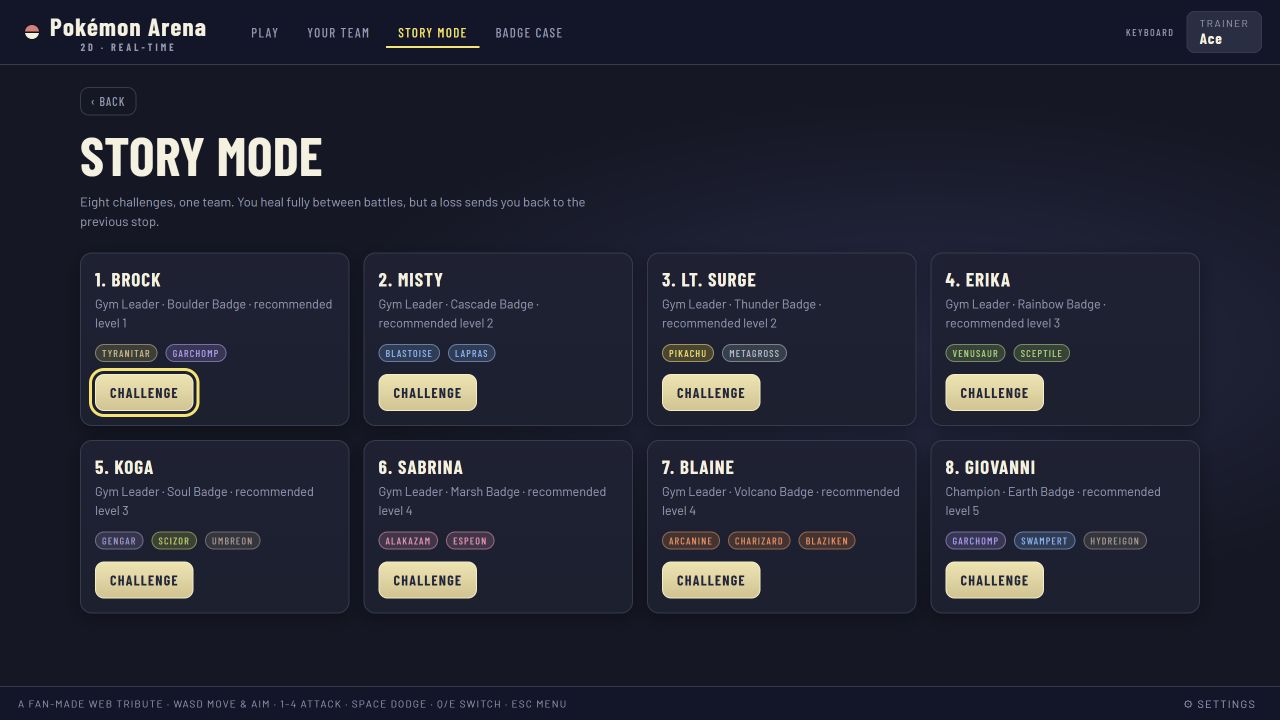
Story Mode organizes eight gym challenges into a badge route. The game menu and badge case are visible in the screenshots below. The route includes Brock, Misty, Lt. Surge, Erika, Koga, Sabrina, Blaine, and Giovanni. This guide uses the opposing lineups displayed in the live game's Story Mode screen when checked on October 19, 2026. If the source game changes a lineup, follow the current screen. The battle plans here are study methods and strategic suggestions, not a promise that a specific Pokémon or type will automatically win.
An effective story run is a chain of small observations. You do not need to memorize every attack before the first badge. You need a repeatable way to enter a new challenge, identify the active threat, manage your team, and review the result. A loss can be useful if you learn why an approach failed. Repeating the same lost approach without changing your timing or lane usually teaches very little. Use Quick Battle for isolated practice when a particular skill keeps interrupting your story progress.
Prepare a badge run
Open Story Mode and inspect the challenge screen before committing. Look at the opponent names, your selected trio, and any information about the arena or rules the current build shows. Do not rely on a remembered guide if the game screen disagrees. Select a lead that you can control confidently. A lead that feels safe for the first ten seconds can gather information about the opponent's spacing and attack rhythm, even if another teammate eventually does most of the damage.
Set one learning goal for each attempt. “Win the badge” is the outcome, but it is not a useful input. Better goals include “do not dodge before an attack is visible,” “leave cover before using a straight-line move,” or “switch before my lead becomes trapped.” These goals keep the run productive regardless of the result. If you win while repeatedly ignoring your chosen goal, that may still be a fragile win. If you lose while improving the goal, you have a clearer next step.
After a challenge, write four brief notes: the active opposing creature that caused the most trouble, the arena position where the problem occurred, the action you tried, and one change for the next attempt. Keep it short enough to write between games. A sentence such as “I crossed the middle after Garchomp had already turned toward me; next time I will wait behind the left obstacle until it commits” gives you a test. A sentence such as “Garchomp is unfair” gives you no next action. You can later compare whether your changes actually helped.
Brock: Tyranitar and Garchomp
Brock's listed team contains Tyranitar and Garchomp. The first practical task is to learn how each closes distance or controls a lane in the current version. Start from a position with an escape route. Avoid charging into the center before you have seen what the active opponent does with a clear line. Use a single safe attack as a probe, then observe whether the opponent advances, waits, or changes angle. That response can guide your next move more reliably than a broad type assumption.
When Tyranitar is active, watch whether your attacks force a change of direction. If they do not, reconsider the angle rather than spending more PP on the same blocked path. When Garchomp becomes active, notice the moment it reaches a distance that feels dangerous to your lead. You can prepare a dodge or switch before that moment; panic inputs after it arrives are harder to execute. The exact move timing belongs to the live game, so practice observing visible animation and recovery instead of trying to follow an unverified frame count.
For a practice plan, choose one creature you can aim from a safe distance and one you can steer comfortably near cover. The third slot can be a stabilizer you trust when the fight becomes messy. Do not infer that these roles require particular named Pokémon. Run one attempt to learn the opening, one to test a different lane, and one to test a purposeful switch. If all three fail at the same point, use Quick Battle to rehearse that single movement pattern. The key badge lesson is not a secret counter; it is entering only when you can also leave.
Misty: Blastoise and Lapras
Misty's listed team contains Blastoise and Lapras. Treat the challenge as a test of lane management. At the start, identify whether your preferred attack line is clear. If cover blocks it, move to another angle before firing. If you expose yourself to create a line, know where you will retreat after the move. An opponent that makes you approach repeatedly can tempt you to abandon this basic geometry, especially after a few shots fail.
Watch how much of the arena you give up while seeking a better angle. Retreating a little can be useful, but backing all the way to a boundary leaves fewer routes when the opponent follows. Choose a home position that has at least two possible exits. If the active opponent stays near a valuable zone, consider whether you can challenge it indirectly by threatening a different lane. You do not have to cross the most defended route merely because it is the shortest distance between two sprites.
The trio practice task is to switch when the opponent has adjusted to your first attack lane. The incoming teammate should offer a different useful distance or angle, not simply a fresh health bar in the same exposed square. After the battle, ask whether you lost to the opposing moves or to your own repeated route. If you can name the route, you can practice a replacement. Misty's challenge is a good place to learn that changing position is often more important than changing the label on your lead.
Lt. Surge: Pikachu and Metagross
Lt. Surge's listed team contains Pikachu and Metagross. The pairing can make it tempting to keep changing your pace: chase a mobile threat, then rush into a more deliberate one. Instead, preserve your own rhythm. Track the active creature and decide what distance your chosen teammate can handle. If Pikachu's movement makes your aim unreliable, stop firing during every turn and wait for a clearer line. If Metagross changes the shape of the next exchange, reset your position before committing. These are observations to test, not fixed descriptions of every AI action.
Practice a two-part opening. For the first few seconds, move while keeping the opponent visible and make no attack that you cannot explain. Then take one carefully aimed attempt and leave the lane. This exercise will tell you whether the difficulty comes from aiming, from exposing yourself after attacking, or from spending a resource too early. If your first plan works against one member but fails against the next, use your team's second slot to change the question. Think about movement and range as well as types.
After an attempt, watch for the moment you stopped tracking the active opponent. Did you lose orientation while switching? Did a fast movement pull your camera or focus away from the next danger? Did you assume an attack landed because its effect looked bright? These are concrete issues that can be fixed in a short Quick Battle drill. Lt. Surge's badge challenge is an opportunity to build a reliable reset between opponents. You can pause, reorient, and reestablish a home position rather than carrying the previous exchange's momentum into a new threat.
Erika: Venusaur and Sceptile
Erika's listed team contains Venusaur and Sceptile. Use this challenge to study when to hold a position and when to move. Pick a piece of cover that supports your current moves, but do not treat it as a permanent hiding place. If the opponent changes its route, your useful angle may change too. Conversely, pursuing every movement can drag you away from the position that made your attacks safe. The goal is to move because the geometry changed, not because a sprite moved.
Try a controlled first attempt in which you defend one region for the opening exchange. Note where the opponent approaches and how your attack line behaves. On the next attempt, deliberately change regions after a move is spent. Compare whether that relocation improves your next attack or merely leaves you exposed. This is a simple way to test area control without inventing information about exact plant-themed move effects. The live move cards and battle visuals are the authority for what happens in the current build.
Your team should include an option for both a patient exchange and a sudden change of direction. If your opener becomes stuck behind cover while the opponent takes a better lane, switch only when the incoming creature has a clear plan to use the new angle. After the match, note whether you lost your chosen area through a direct attack or because you voluntarily left it at a poor moment. Those causes call for different fixes. Erika's challenge can sharpen your sense of when staying put is discipline and when staying put is passivity.
Koga: Gengar, Scizor, and Umbreon
Koga's listed team contains Gengar, Scizor, and Umbreon, introducing a three-member lineup. The extra name increases the need to reset your plan between opponents. Before each new active creature enters, locate your own character, nearest cover, and usable escape. Avoid carrying an approach intended for Gengar directly into an exchange with Scizor or Umbreon. The screen may change faster than your plan unless you deliberately pause your inputs for a moment and reorient.
For Gengar, practice reading angle changes rather than assuming it will stay in the last lane. For Scizor, keep an eye on how safely you can leave a close exchange. For Umbreon, do not grow impatient if the fight feels slower. These are training prompts based on the roster, not claims about exact AI move sequences or undisclosed abilities. In each case, the best observation is the one you can verify on your screen: where did the opponent stand, what move appeared, and when could you respond?
Use one match to focus entirely on preserving resources across transitions. Enter each new opponent with a reason for the next dodge and a clear idea of which move you can use without being trapped in recovery. If you win a round but arrive at the final member with no useful options, review earlier exchanges. Could you have used cover instead of an emergency dodge? Could you have switched earlier? A three-member challenge rewards consistency. You do not need a spectacular play against the first creature if it leaves the rest of the team unable to function.
Sabrina: Alakazam and Espeon
Sabrina's listed team contains Alakazam and Espeon. Make visual tracking your priority. When an attack effect appears, determine whether it threatens your current square, your likely retreat path, or neither. Do not dodge merely because the screen becomes busy. If an obstacle blocks your own line, move for a clear angle rather than repeatedly firing into it. The exact properties of the current moves should be learned in the live game, not borrowed from unrelated Pokémon titles.
A useful drill is to spend one attempt attacking only after you have named the target's position relative to cover: left of the obstacle, right of it, or in the gap. This may feel slower, but it can reveal how often you were aiming at the portrait in your mind rather than the sprite on the field. On the next attempt, add one preplanned switch after the first opponent change or after your lead loses its preferred lane. Your aim is to keep control of your own decisions while the opposing visual effects compete for attention.
After the battle, ask whether the difficulty was reading danger or creating offense. If you can evade but cannot land a move, work on facing and attack lanes. If you land moves but lose health during recovery, work on the position you occupy after the attack. If you lose control during a switch, rehearse the transition in Quick Battle. A single label such as “hard matchup” hides these distinct problems. Sabrina's challenge becomes more manageable when you identify the precise part of the exchange that you cannot yet repeat reliably.
Blaine: Arcanine, Charizard, and Blaziken
Blaine's listed team contains Arcanine, Charizard, and Blaziken. Three recognizable attack-focused names can encourage you to play too defensively or to swing back recklessly after taking damage. Set a rule for the opening: see one move, choose one response, and reset your position. You can become more assertive after you understand the timing. Do not assume that all three opponents behave alike merely because their familiar names suggest a theme. Watch the active creature and the current move effect.
When you are pressured, distinguish a safe retreat from an aimless run. A safe retreat preserves an angle, a cover route, and a way to counterattack. An aimless run may carry you into a wall and make the next attack harder to avoid. Before the match, pick two pieces of cover you can travel between. During the match, change the route if the opponent blocks it. This gives your defensive movement a purpose and helps you notice when an opponent commits to one side.
Your team plan should specify who absorbs the first information-gathering exchange and who enters if that lead loses the lane. Save the closer for a state in which you know its first action. If a loss occurs late in the challenge, do not automatically redesign the entire lineup. Check whether you spent too much health or PP in an earlier, easier exchange. Blaine's challenge is a good test of composure across a sequence. Consistent, modest decisions can preserve more resources than alternating long retreats with desperate bursts of offense.
Giovanni: Garchomp, Swampert, and Hydreigon
Giovanni's listed team contains Garchomp, Swampert, and Hydreigon. Approach this as a final examination of your route plan. You have encountered Garchomp earlier in Brock's lineup, but the surrounding team is different. Do not assume the same opening will solve the whole challenge. For each opponent, identify your comfortable distance, a useful cover position, and the point at which you would switch. Write these three things before an attempt if you are repeatedly losing track under pressure.
The most valuable adjustment may be small. If a direct route toward Garchomp fails, try waiting for a visible commitment and entering from another side. If Swampert makes a lane difficult, reposition before spending more PP into it. If Hydreigon appears while your lead is low, switch from a stable square rather than as a last emergency input in the open. These are prompts to test on the live battle screen, not claims of guaranteed counters or exact AI behavior.
Play the challenge in segments. After each opposing creature, ask whether you are still in a position you would voluntarily choose for the next exchange. If not, take a moment to move before attacking again. Do not let the relief of one knockout become the cause of the next loss. When you finish an attempt, review the first avoidable mistake rather than only the final hit. Late failures often begin with an earlier resource spent without a plan. Giovanni's badge is a suitable place to apply every skill from the route: information gathering, deliberate movement, useful switches, and calm review.
Use the badge case as a progress journal
The game's badge case shows the route visually. A badge is a useful milestone, but it does not explain what changed in your play. Pair each badge with one note about a skill you gained. Perhaps Brock taught you to approach after an opponent commits, while Misty made you reconsider a blocked lane. Perhaps Koga taught you to preserve resources across three opponents. The note helps you carry a lesson forward instead of starting from zero at every gym.
If you become stuck, play one lower-pressure Quick Battle that reproduces the problem. Keep the same team member and choose an arena that contains a similar lane or obstacle. Practice only the troubling action for a few minutes: crossing open space, aiming after a lateral move, leaving cover, or switching from a safe square. Then return to Story Mode and test whether the action improved. This targeted loop is usually more informative than repeating a full challenge while making the same first mistake.
Some players prefer to clear badges quickly; others enjoy mastering each fight. Both approaches can use this guide. For a quick clear, take one concrete note from a loss and change only that action. For a mastery run, repeat a cleared challenge or a similar Quick Battle until you can explain why each switch and dodge occurred. The source game may update its opponents or rewards, so revisit the live menu when your experience differs from the text. The lasting strategy is learning how to inspect the challenge in front of you.