Improvement in Pokémon Arena 2D is easier to see when a practice session asks one question at a time. A normal match asks you to move, aim, choose among four moves, monitor PP and cooldowns, dodge, switch, read the arena, and respond to an opponent. That makes it exciting, but also makes a loss difficult to diagnose. This lab breaks a match into small exercises that can be repeated in Quick Battle. Each drill has an observation, an action, and a review question. None depends on secret frame data or a supposedly guaranteed counter.
Use a familiar trio and an Easy CPU while learning a drill. Keep the arena constant until the input feels reliable, then transfer the same drill to a second map. The point is to make a skill portable. A perfect sequence performed only in one corner of one battlefield may be a memorized route, not a general ability. Once the skill works in two settings, increase the opponent's difficulty or return to Story Mode to test it under more pressure. If the source game changes, these drills remain useful because they focus on what you can observe directly.
Set a baseline before changing anything
Start with three short Quick Battles using the same team, arena, and CPU difficulty. After each, record the earliest moment when your plan broke down. Do not record only whether you won. A win can conceal an avoidable problem, and a loss can contain a well-executed improvement. Mark one of five categories: movement, aim, resources, defense, or switching. If several categories appear, pick the first one that caused the others. For example, a missed attack may be caused by facing the wrong direction before you pressed a move; poor aim may be caused by movement, not by the attack itself.
Now describe the problem without blaming the game or a character. “I used Space when the opponent approached, before it attacked” is observable. “Dodge is bad” is too broad. “I fired while cover blocked the lane” is observable. “My team has no damage” may be an impression that disappears once you choose a clear angle. This is not about being harsh on yourself. It is about giving the next practice round a testable goal. A small, accurate diagnosis can turn five frustrating rematches into five controlled experiments.
Keep the notes simple. Arena, team, CPU setting, goal, and one result are enough. You do not need a spreadsheet or video analysis to improve at the basics. If you do record a clip, review the few seconds before the first mistake rather than staring only at the final knockout. Often the last hit is a consequence of a position chosen much earlier. The drill sections below give you ways to test the most common causes.
Drill one: the movement square
Choose an open part of the map where you can see your creature. Move in a square: right, down, left, up, then stop. Do it once slowly and once at a normal battle pace. The target is not speed. The target is to stop at roughly the intended corners without drifting into an obstacle or losing orientation. If you play on touch, note whether your thumb slides away from its starting point. If you play on keyboard, note whether you keep a key held after deciding to stop.
Repeat the square while watching the opponent rather than your own character. Your peripheral vision should still keep your position clear. If you lose track of your sprite, slow the drill and shrink the square. Then repeat near a piece of cover. The cover version teaches you to navigate an actual fight, where you cannot always travel in a clean straight line. Finish by choosing a safe exit from each corner. The moment you can name two exits, you are less likely to be trapped by a single surprise approach.
Review the drill by asking whether your final position matched your intention. If you started with a square and ended at the arena edge, the movement input or visual tracking needs work. If you completed the path but never looked at the opponent, the drill is not yet ready for live combat. Continue until you can maintain the route while keeping the enemy visible. The same skill supports attacks, dodges, and zone contests because every one of those actions begins with knowing where you are.
Drill two: facing before firing
Pick one move whose visual path you can recognize. Before each use, move into a clear lane and deliberately face the opponent. Pause for a fraction of a second to confirm the line, then press the move. Use only that move for several attempts. If it misses, classify the miss: wrong direction, wrong range, obstacle, opponent movement, or uncertain. Avoid declaring that the move is inaccurate without evidence. The category tells you what to change on the next attempt.
On the second pass, add lateral movement. Move left or right, stop or adjust facing, then fire. This is harder because your travel direction and attack direction may compete. The game uses movement direction for aiming in its core controls, so the final movement input matters. Test it in a low-pressure battle instead of trying to learn while a gym opponent is attacking. Do not worry about doing high damage during this drill; your success measure is whether you can send the attack along the line you intended.
On the third pass, fire near cover. Choose a gap you can see clearly. Step out, face, use the move, and step back. Do not stay in the exposed lane merely because your attack animation is interesting to watch. If you cannot step back before the opponent responds, the issue may be recovery timing or a poor starting position. The drill teaches you to connect aiming with an exit. That is more valuable than a single well-aimed attack that leaves you unable to defend the next exchange.
Drill three: one dodge for one reason
Enter an Easy CPU battle with a rule: every dodge must answer a visible threat. A threat can be an attack effect entering your space, an opponent commitment you recognize, or a position where ordinary movement will not escape in time. Do not use Space merely because the opponent is nearby. After each dodge, mentally name the threat it addressed. If you cannot name one, you probably spent a defensive option without a plan. That is useful information, not a reason to abandon the drill.
For the next few dodges, focus on direction. Before pressing, ask where you will land. A dodge that avoids the current attack but places you against a boundary may create a worse next decision. Choose an exit that preserves at least one route. In Cinder Crater, where the zone can refresh dodge, compare a defensive use followed by a safe reward attempt with a premature dodge used only to reach the zone. The second may look active but leave you exposed if the reward is contested.
Review by counting meaningful dodges, not total dodges. If you used one dodge and it prevented one obvious hit, that may be a better round than five dodges that moved you around without changing the opponent's advantage. Once you can defend a clear threat, add a counterattack from the landing position. The aim is a sequence of observe, escape, reorient, and act. A dodge is not a magical pause button; it is movement into the next exchange.
Drill four: resource-aware attacks
Choose two moves with different uses after inspecting the live card. You might select one you use often and another that is more situational. Play a short battle in which you do not press either move unless you can name the intended effect: create space, challenge a lane, punish recovery, or finish a low-health opponent. Watch PP and cooldown displays after each use. The purpose is to learn how the resource state changes your choices, not to memorize a fixed rotation.
In a second round, intentionally preserve one move for a specific situation. For example, hold it until the opponent crosses a gap or commits to a close approach. You may discover that the move is more reliable when used as a response than as an opener. You may also discover that saving it costs too much pressure. Both outcomes are useful if they come from observation. In Indigo Stadium, test whether a PP refill changes the moment at which you can use the move again. In Celestial Ruins, test whether cooldown relief actually creates an extra safe attack or merely tempts you into the same blocked lane.
Afterward, write one sentence about the most wasteful use of a move. Was it blocked by terrain? Did you fire while facing away? Did the opponent already leave the target area? Did you use it at a moment when a cheaper movement choice would have achieved the same thing? Fix the cause in the next round. Resource discipline is not hoarding; a full PP bar at the end of a loss can indicate that you never took a valid chance to fight. The goal is to spend when the action has a clear path to value.
Drill five: the planned switch
Before a match, choose a switch trigger. It might be losing your preferred lane, a visible status effect, a teammate becoming too low to survive another mistake, or the opponent presenting a matchup your next member handles more comfortably in practice. State the trigger before battle. When it occurs, move to a reasonably stable square and switch. Then use a simple first action with the arriving creature. Avoid the common mistake of switching in the open and immediately pressing an unfamiliar move.
The first round is successful if you complete the planned transition safely, even if the match result is poor. In the second round, test the same trigger earlier. In the third, test it later. Compare which timing preserved more health and position. This teaches you that switching is a timing decision, not merely a roster feature. A character with the perfect theoretical answer cannot help if it arrives after the original creature is already trapped and the opponent still controls the same lane.
Use the pause menu after a round if you need a break to write down what happened. A switch screenshot on this site shows Pikachu entering a live match, but the visible moment does not tell you whether it was a good decision. Only the surrounding situation can answer that. Ask where the departing creature stood, where the incoming creature appeared, and what action became possible. If the switch changed none of those things, rethink the trigger or the teammate's role.
Drill six: contest a zone and leave it
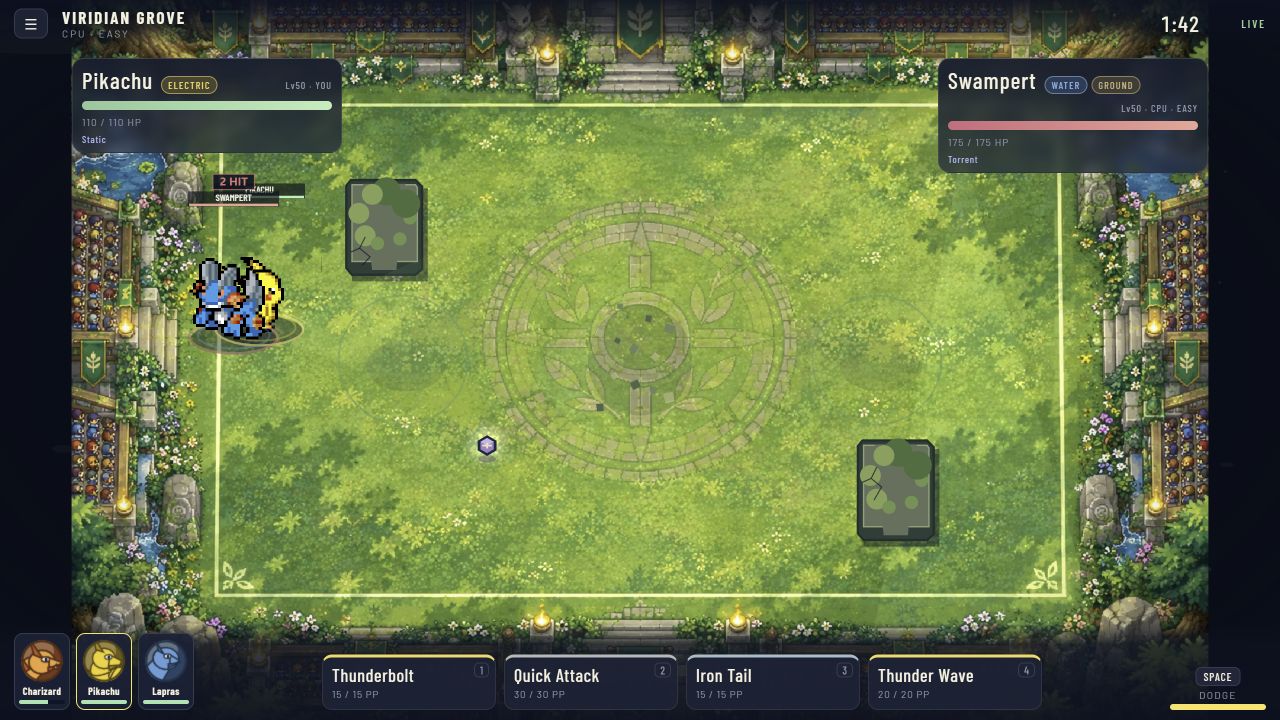
Select an arena with a reward that is easy to recognize, such as the healing zone in Viridian Grove. Before entering, identify a route in and a route out. The first attempt should prioritize reaching the zone without taking an avoidable attack. The second should prioritize leaving the zone in a position where you can act. The third should combine both. Do not judge the exercise only by whether the zone effect activated. A reward collected at the cost of a poor next position can be a losing trade.
Change the arena and repeat. On Azure Coast, the cure reward may be irrelevant until a status is active. On Frostpeak Summit, extra speed may change your exit timing. On Indigo Stadium, a PP refill is most useful when you can spend the resource afterward. This transfer across arenas trains you to ask what the objective is worth now, what it costs to reach, and what you will do next. Those questions are more durable than memorizing a single path from one spawn point.
If you consistently lose the zone fight, try controlling an approach lane instead of occupying the reward. Watch whether the opponent crosses a predictable gap. You may be able to attack from safety, force a retreat, or create a later opening. Sometimes giving up the immediate reward preserves enough health to win the next exchange. A practice drill should let you compare those choices. It should not pressure you to treat every glowing zone as an order to run straight toward it.
Drill seven: a three-round story preparation loop
When a Story Mode challenge blocks progress, stop repeating the full fight without a plan. First, play one story attempt as reconnaissance. Record the opposing lineup shown by the game, the first troublesome position, and one move or transition you did not understand. Second, play a Quick Battle that resembles the troublesome situation. Use the same team member and practice the relevant skill, such as leaving cover before attacking or switching from a safe position. Third, return to Story Mode and test one change.
Keep the change small. If Brock's Garchomp reaches you before you act, try moving behind a particular cover piece before your first attack. If Misty's lineup makes your shots hit obstacles, test a different lane. If Koga's third member catches you low on resources, work on spending less during the earlier exchange. These examples are ways to frame practice, not claims that each CPU follows a fixed script. The live challenge can change, and your job is to respond to what it actually shows.
After the third round, assess whether the chosen change affected the first troublesome moment. If it did, preserve it and identify the next problem. If it did not, ask whether you executed it consistently. A good idea performed once by accident is not yet a reliable solution. If you did execute it and the result stayed the same, form a new hypothesis. This loop turns an intimidating badge into a series of manageable tests. It also protects you from mistaking a lucky win for a repeatable strategy.
Build a weekly practice plan
Before you set a schedule, decide what counts as evidence of improvement. Wins are one measure, but they combine your execution with matchups, arena choice, and the opponent's mistakes. Add two measures you can control. One might be the number of attacks you launch through a clear lane instead of into cover. Another might be the number of dodges you can explain after the round. A third might be whether you complete a switch from a stable position. These measures are intentionally simple. They make your next training choice clearer even when the scoreboard is disappointing.
Consider a player who loses three matches on Viridian Grove. In the first, they repeatedly chase the healing zone while the opponent holds the direct lane. In the second, they approach from a side route but remain in the zone after healing and get punished. In the third, they approach from the side, collect the heal, and leave toward cover, yet still lose a later exchange. The match result is unchanged, but the arena decision improved substantially. The next practice target is the later exchange, not another rewrite of the route to the heal. This is how a useful review can reveal progress that a win-loss record hides.
Consider a different player who wins a Quick Battle with Pikachu after using every dodge as soon as the opponent moves. The win may feel convincing, but the defensive habit is fragile. On a harder setting or against another character, the same early dodges may be punished. A review should recognize the win and still ask whether the dodge inputs answered visible threats. If the answer is no, the next drill is defensive timing. You can celebrate an outcome without treating every action inside it as a model to repeat.
When an experiment fails, check whether its conditions were fair. Did you change the CPU difficulty, arena, team, and input device together? Did you compare a rested first match with a tired tenth match? Did the source game update between sessions? If several variables changed, your result cannot identify which one mattered. Repeat the test under simpler conditions. This is not formal laboratory science; it is a practical way to avoid drawing a sweeping conclusion from one messy round. A clear comparison saves time when you are choosing a teammate or setting.
Use screenshots as reminders of what the live game actually shows. The images on this site include the title, main menu, team selection, Story Mode, badge case, arena selection, battle, attacks, switching, pause, and settings. They can help you remember which menu contains an option, but they are still snapshots. They do not reveal the exact result of an input or prove a particular strategy works. For combat questions, return to the game and test. For factual menu questions, compare the screenshot with the current build. If they differ, trust the current build and update your notes.
Finally, allow a practice goal to be small. Ten minutes spent learning to face before firing can change many later fights. One controlled switch can be more valuable than cycling through the whole roster without understanding why a new member entered. A session that ends with a precise observation is successful even if you have not earned a badge that day. The value of a practice lab is that it lets you return tomorrow knowing exactly what to try first.
A short, consistent session can be more informative than a long session of frustrated rematches. On the first day, establish a baseline and choose one movement problem. On the next day, work on aiming from a clear lane. Then practice defensive timing, resource choices, switches, and zone control. Use the final day to play Story Mode or a higher CPU setting and see which skills transfer. The sequence is a suggestion, not a rigid curriculum. If your biggest problem is touch input, begin with mobile calibration instead.
At the end of each session, write one action that improved and one action that still needs work. Keep the evidence concrete. “I waited for a visible attack before dodging in three exchanges” is progress. “I am better now” may feel good but offers no next drill. If a skill worsens under pressure, return to the easier setting and gradually add complexity. You can keep the same arena while raising difficulty, or keep difficulty constant while changing arena. Change one variable at a time so that you can understand the result.
Take breaks when your decisions become automatic in the wrong way. Repeatedly rushing through the same lane is a sign to pause, not to press harder. Review a screenshot or note, choose a new route, and restart with a clear goal. The game offers many characters and arenas, which makes experimentation appealing. Use that variety deliberately. Try a new creature to answer a specific problem; try a new arena to test whether a skill travels; try a new CPU setting to see whether the skill survives pressure. The purpose of practice is to make the next live choice easier to see.